How To Make Small Batch Wines And Meads

Craft ferments have increased in popularity during the past few years. Nowadays, there are many places you can buy natural meads and wines. However, if you want something really unique, you should ferment your own meads and wines.
The process is easier than you think and making the meads and wines yourself means you have full control over flavor and taste. The trick is to start with small batches until you manage to achieve the best results. So we’re going to teach you how to make small batch wines and meads today.
This extensive guide will be your foundation for making wine and mead at home. You can adjust the recipe as you please to create different batches with different flavors. The main advantage of smaller batches is you don’t have to commit to a single flavor. Additionally, since you won’t use a large quantity of ingredients, you’ll take away the pressure of messing up and you will allow yourself to be more creative.
Now, without further ado, let’s get started and see why, what you need, and how to make small batch wines and meads.
Why Make Small Batch Wines And Meads
Instead of making large batches of wines and meads, make small ones. Why? First of all, if you are a beginner, it is best to experiment with small batches. Second of all, because it’s way easier to get the taste right. Most importantly, you can experiment with fruits and herbs you like and you can make micro batches with mead and wine with different flavors.
The recipe can be adapted as you want - you can add different herbs, fruits, cider, condiments, and so on. Micro batch wine and mead make great gifts for friends and family so you can create something you know they enjoy.
What Do You Need To Make Homemade Mead And Wine
Homemade meads and wines are easy to make. We will go through the process in a little bit but first, let’s discuss equipment and ingredients.
Equipment
Mead, wine, and cider use the same principle as fermented veggies so, to make meads and wines at home, you need fermentation tools for lacto-fermentation. The whole idea behind lacto-fermentation is to allow the fruits and veggies to ferment naturally at room temperature. During the fermentation process, you want to prevent spoiling bacteria to enter the container but, at the same time, you want to allow the gasses from the container to escape. If you don’t, the container may explode.
It may sound complicated but it’s actually easy and all you need is:
- 1 or 2 quart mason jars;
- fermenting kit;
- pot or tea kettle;
- a strainer mesh.
Our fermenting kits are great because they allow for worry-free lacto-fermentation. You don’t have to worry about jars exploding due to CO2 build-up if you use them. Alternatively, you can opt for a plastic bag secured with a rubber band for your first experimental small batch mead. But really, if you ferment your own veggies and become serious about making homemade meads and wines, we really recommend the fermenting kit as it is reusable basic equipment that will make everything easier.
Ingredients
The ingredients list can obviously look different, based on the type of mead or wine you’re making. However, for homemade meads, you always need three basic ingredients:
- honey;
- yeast;
- water.
If you want to make wine, you would obviously use grapes. For fruit meads, any type of fruit will do. For a quart batch, use a cup of fruits. Double the amount for a two quart batch.
Honey
If you want to make a gallon batch, you need two or three pounds of honey. Generally speaking, you should add three pounds of honey if you use tart and astringent fruits to balance out the taste. For example, blackcurrant mead always needs more honey than raspberry mead. But, of course, it is entirely up to you. You should adjust the recipe to your own taste.
If you want to make smaller batches, use the three pounds to a gallon ratio to calculate a convenient rate. Three pounds of honey means four cups of honey.
A quart batch is ¼ the size of a gallon batch, which means for a quart batch of homemade mead, you need roughly a cup of honey. If you like your mead sweet that is. You can use ¾ cup of honey for a less sweet mead variety. For a two quart batch, use two cups or one and a half cup of honey.
If you want to make a dryer mead, you have to use less honey. For one quart batches, this means you want to use 2/3 of a cup. However, anywhere between 2/3 of a cup and a full cup works just fine.
You can use any type of honey you want but keep in mind that the taste of honey will influence the taste of your mead so always choose complementary flavors.
Yeast
Just as honey, yeast impacts the taste of your mead. But, while experimenting with different honey flavors, can create delicious results every time, with yeast, the things are a little trickier. Any yeast can make alcohol but not any yeast will make a good alcohol. For example, if you use bread yeast, you will probably not like the result.
Ideally, you would use champagne yeast for mead as it doesn’t put out any flavors. For wine, you can use wine yeast. The downfall is that brewing yeast packets usually come for 5 gallon batches and if you want to make two-quart or one quart batches, you can end up with leftover yeast. The good news is you can store the dry yeast in the fridge.
Logically, you would think that you need to calculate the exact amount of yeast you need for a quart batch. However, that’s not really the case, especially for wine. If you want to make a gallon of homemade wine, you need to use the whole package of yeast even though it’s intended for 5 gallons. That’s because the packet contains the minimum amount of yeast cells to start a viable fermentation process. On the other hand, for mead, you can use about a quarter of the quantity and save the rest of the dry yeast in the fridge.
Another important thing to remember is that you have to rehydrate yeast before mixing it with honey. A high sugar environment can kill the yeast cells so be sure you rehydrate the yeast first. Use a small amount of water for the process. For a quart batch, you can use ¼ cup of water.
Liquid yeast is also an option so if you don’t think you can get the amounts right, use liquid yeast instead. But, again, for quart or two quart mead batches, you should use only a part, not the entire vial.
How To Make A Quart Batch Of Mead Or Wine
Now that you know the basics, you are ready to get started! The process only gets easier from here. All you have to do is:
- add honey at the bottom of the mason jar;
- boil about three cups of filtered water in a pot or tea kettle;
- if you want to make a flavored batch, you should steep the spices, herbs or other flavorings with water then add them to the honey;
- if you make fruit mead or wine, now it’s time to add the fruits – 1 cup for 1 quart batch;
- pour the hot water into the jar until the jar is ¾ full;
- stir until the honey dissolves completely;
- let the honey-water mixture cool until it reaches 90-100 degrees F;
- add the rehydrated yeast;
- top with water – allow about 1-inch space at the top of the jar;
- add the fermenting lid on the jar;
- ferment for 4-6 weeks in total, at room temperature, away from direct sunlight;
- after primary fermentation is over, strain the brew and transfer the liquid into a clean container;
- resume fermentation.
Very important – use filtered water, not tap water as tap water contains chlorine that can negatively impact fermentation.
To give you a better understanding of the fermentation process, we explained the difference between primary and secondary fermentation below.
Primary And Secondary Fermentation
You would oftentimes hear homebrewers talk about primary and secondary fermentation.
As the name implies, primary fermentation refers to the initial period of fermentation. During this time, bubbling activity is vigorous due to the chemical reaction between yeast and the sugar in honey. This period lasts for one or two weeks but it takes about one or two days to start so don’t panic if you don’t notice active fermentation during the first 24 hours.
During secondary fermentation, you will notice less activity as the yeast settles down. While it’s not mandatory, it is highly recommended to pour the brew into a clean container after primary fermentation is over. Leaving the sediment behind results in a clearer final brew. Not only that but filtering out any solid spices or fruit chunks can also improve the quality of the brew. Any fruit chunks that float above the water level can mold overtime while spices can add too harsh flavors if they are left for too long. So use a fine mesh strainer to filter out solids.
Bottling Small batch Mead And Wine
For large batches, you need a siphon to transfer the brew into different containers. However, with small batches, you can easily and successfully pour the mead or wine into a separate container without a siphon. Make sure you pour slowly to leave the sediment behind.
For bottling, you just need a clean mason jar or a glass bottle. Just cap the jar or the bottles. If your bottle doesn’t come with an integrated cap, you might need a bottle capper or regular wine corks.
At this point in the process, some meads and wines taste better than others. Some can be straight-up horrible. But this doesn’t mean you did something wrong during fermentation. It just means the meads are still raw and they need more time to develop their taste. Typically, you should allow wines and meads at least two weeks before you serve them. Preferably more. As a rule of thumb, flower meads or spicy meads need more time than basic ones.
However, if the mead or wine tastes like vinegar, something really went wrong. Don’t get discouraged! Use the vinegar as salad dressing and try again.
Extra Tips For Making Homemade Mead And Wine
This guide for how to make small batch wines and meads should serve as a foundation. For a basic mead recipe, all you need is honey, yeast, and water. But the sky is the limit.
Starting with an experimental batch takes away the pressure. But it also allows you to be creative as you don’t have high expectations for a first batch. So you can add a few tablespoons of herbs to the honey or replace water with juice, tea or cider. You can even create a spicy mead with hot peppers.
If you make wine, you should use a cup of grapes but for other fruits, you can start with smaller amount of fruits (1/4 or ½ cup) and add more spices and herbs.
You can experiment with different fruits, spices, and herbs. You can even add raisins to your batch since they will give the yeast a boost by adding extra nutrients.
Adding chamomile tea to a simple mead can make for a delightfully-flavored batch of mead.
No ingredient is prohibited. However, some can change the chemistry of the brew. You should be particularly careful with these ingredients. For example, lemon or lime juice can make your mead or wine too acidic and harsh so it’s best to limit the quantity you add to your brew. On the other hand, a slice of lemon or other citrus fruit can add the right amount of acidity and bitterness. Not to mention amazing citrus flavors.
Related Content

How To Make Kimchi
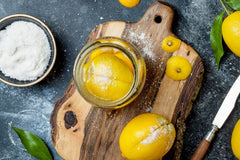
How To Make Preserved Lemons
How To Make Kanji Drink – Recipe & Tips

How To Make Fermented Pineapple Salsa
10 Foods To Avoid To Keep Your Gut Healthy